
Are you having a great week? I sure hope so! Can you believe it's Thanksgiving week. Where on earth did October and November go? It sure seemed like it sped right through!
The first thing I'd like to do is thank everyone for all the sweet and supportive comments left on my last post. They sure lifted my spirits. The last year has really been a challenge but I see blue skies ahead!
In October, our area has tons of craft fairs and I try and attend as many as possible. My goal for these trips is to try and find some cute ideas to use for making Christmas presents. I'm primarily looking for ideas that won't cost a ton of money, are easy to make and make cute homemade gifts. I've never been disappointed in this quest, I always find something that I can recreate and this year was no different.
My find was a sweet little towel angel.

Now, maybe you've seen one or have made them before but the idea was a new one for me. So I looked it over for a few minutes, figured it all out and I had my plan in place. So here's how I made my angel towel.
Supplies needed:
One kitchen towel set
3 cotton balls
2 zip ties - 6" in length(mine were 8" and way to long)
3 rubber bands
scissors
ribbon
embellies

From the towel set you will need the dish cloth, the towel and an oblong pot holder that has rounded corners. Make sure you check the pot holders before you purchase. I ran across several sets with oblong pot holders but they had square corners on them. I didn't really want pointy wings, so I choose the sets with the rounded corners.

My plan was to have the solid side of the pot holder showing for the wings, but the tag was really obnoxious so I cut it off.

The pot holder hanger also functions as the hanger for the angel. Now fan fold the pot holder along the longest edge. Once folded, use rubber bands on both ends to hold the folds in place.

Place the zip tie in the middle of the pot holder. Make sure you place it so that it goes between the hanger and the holder.

Now pull the zip tie tight. Do it slowly and adjust it as needed to keep it in the center of the pot holder. Watch the little square connector as you tighten it. The connector should stay in the middle of the side of the pot holder that you want to show. This will keep the connector hidden when you have your angel all put together.

Trim the zip tie close to the connector, remove the rubber bands and spread out the fan and it should look like this.

Now lay the dish cloth out and try and get it as flat as possible. I turned in the edges of the cloth because I wanted the ends to look a little neater.

Tightly roll up the dish cloth, straightening up the edges as needed.

After it is all rolled up, use rubber bands on both ends to hold it together. Place your rubber bands about an inch or more from the ends. This will make it easier to tie on the ribbon. Wow, it's been about a whole 3 minutes and two pieces of the angel are done!

Now open up the towel and fold it in half.

Squish the 3 cotton balls together to try and form one big ball and place it at the top and center between your folded towel.

Now this is probably the trickiest part of the whole thing. I wanted my angel to have a nice A line dress so I started with a triangle fold like this.

Once this initial fold was done, I gathered it all together by squeezing closely under the cotton balls. Then it was pretty much fuss a litle, tighten up and squish the cotton balls and fuss some more. The whole time it was straightening folds and mushing and squishing cotton balls until it looked nice and round and neat. Once I was satisfied that it looked good, I used a rubber band to temporarily hold everthing in place, so that I could lay it down flat and just give it one more double check before I made it permanent.
The front looks pretty good.

The back doesn't look too bad! So it's ready for the next step

To attach the wings, slide the second zip tie underneath the first zip tie on the wings. Now be carefull here, with taking pictures and all, I forgot that I wanted the solid brown side to be the showing side and I placed my second zip tie on the patterned side vs the solid side.

Place the dish cloth roll over the head of the doll. Make sure the cloth is centered and that the "arms" are of equal length on both sides. I used a rubber band to temporarily hold the cloth on the head. Place the rubber band at about the center face area so that it doesn't interfer with the placement of the second zip tie.

Now lay the angel, face up on top of the wings making sure that the second zip tie is between the wings and the angel and that the wing hanger is located at the top of the head.

Tighten up the zip tie, making sure that it stays right under the head and that the connector piece winds up hidden between the angel body and the wings. Pull it slowly and get it as tight as you can so your angel head doesn't flop around.

Trim the end of the zip tie as close to the connector as possible and remove the rubber bands from the head.

Now tie some ribbon around the end of her arms to hold the roll and then remove the rubber bands.

Isn't that just the cutest towel angel? I think it took about 15 minutes from start to finish and most of that time was folding and squishing on her head. lol
Add a few more or a lot of embellies and you have an awesome little homemade gift for that special person. Once they tire of the angel, they can take it apart and have some useful kitchen items. That's what I call repurposing! lol
Two down and how many more do I have to make? YIKES! I better get busy! lol

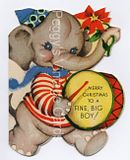
Staying with the angel theme, here's a really sweet angel image for you. This card is circa 1946 through 1949. Isn't it sweet? Make sure you click on it before you save it.

Have a great week, plumb full of smiles!
Peggy


OMG! How cute is this, Peggy? I've never seen these angels before. Darling idea and thanks for the tut. Hope you had a lovely Thanksgiving. xxD
ReplyDeleteOh and thanks for the lovely freebie too. xxD
ReplyDeleteWhat an awesome tutorial sis!!! LOOOOVE it! Cept I can't make one for you! HAHA! And you figured all of this out by looking at it for a few minutes at a craft fair???? Yep...you're definitely mom's daughter! :) You're a freakin' genius! Love you!!!
ReplyDelete